> ## Documentation Index
> Fetch the complete documentation index at: https://www.c1.ai/docs/llms.txt
> Use this file to discover all available pages before exploring further.
# Segment users with profile types
> Profile types allow you to categorize your users and define a customized, relevant set of attributes for each segment, enabling precise data management and targeted access reviews.
## What are profile types?
In C1, profile types provide the foundation for managing user data with precision and efficiency. They offer a powerful way to segment your workforce and ensure that your administrators and reviewers only see the information relevant to a specific user group.
Profile types solve the challenge of managing diverse user populations (like full-time employees, contractors, and vendors) within a single system. Instead of applying every possible user attribute to every single person, profile types allow you to select a specific, tailored set of attributes (like work\_location or contract\_end\_date) that are relevant only to that group. This eliminates noise and makes user profiles cleaner and easier to read.
Profile types also enable powerful filtering and segmentation when creating User Access Review (UAR) campaigns and policies. You can build rules based on both the profile type and the specific attributes within it.
## What kind of profile types should I create?
Profile types are most commonly used to segment different broad categories of employees. Most organizations will find it useful to create one profile type for **Full-time employees** and another for other people associated with the organization, such as:
* Contractors
* Retirees
* Seasonal or temporary employees
* Interns
* Partners
This second profile type could be named for a specific employee type or could be a general category such as **Other employees**.
The ideal profile type design will depend on how your organization is structured and what kind of employee data is important to keep segmented.
## How do custom attributes reach user profiles?
Custom attribute data doesn't appear on a C1 user automatically. It flows through a series of steps, and each step must be configured for the data to reach the user's profile. Understanding this chain helps you troubleshoot when an attribute you expect to see isn't showing up.
Here's the full lifecycle of a custom attribute:
1. **Connector syncs data from the source system.** When a connector syncs with a source application (like Workday, Active Directory, or Okta), it pulls user account data into C1. This data is stored on the user's **account** within the connected application. Custom fields from the source system are included in the account's profile as key-value pairs.
2. **You create an attribute mapping.** In the [Attribute manager](/product/admin/attributes), you create a custom attribute and tell C1 which application and which field to pull the data from. This is how C1 knows, for example, that "Employment Type" should come from the `employmentType` field on the user's Workday account.
3. **You bind the attribute to a profile type.** When you [create or edit a profile type](#step-2-add-relevant-attributes-to-the-profile-type), you select which custom attributes belong to it. This binding controls which attributes appear on users assigned to that profile type.
4. **You assign users to the profile type.** Using a [user automation rule](#step-3-assign-users-to-the-profile-type) or manual assignment, you define which C1 users belong to the profile type. Users who aren't assigned to any profile type with the attribute won't see that attribute on their profile.
5. **The attribute appears on the C1 user.** After the next directory sync, the attribute value flows from the account through the mapping and profile type, and appears in the **Profile attributes** section of the C1 user's page. From here, it can be used in policies, access review campaigns, CEL expressions, and [account correlation](#example-using-a-custom-ad-attribute-for-account-correlation).
If any step in this chain is missing, the attribute won't appear on the C1 user. The most common issue is creating the attribute mapping and profile type but forgetting to assign users to the profile type.
### Example: Workday cost center for policy routing
Suppose you want to use a "Cost Center" field from Workday to route access requests to the right approver.
Make sure your Workday connector is set up and syncing. After a sync completes, the Cost Center value is stored on each user's Workday account.
Navigate to **Directory** > **Directory sources** > **Attribute manager** and click **Add attribute**. Select **Custom**, name it "Cost Center", and use **Direct mapping** to select your Workday application and the `costCenter` field. Click **Create**.
Navigate to the **Profile types** tab and select (or [create](#create-a-new-profile-type)) the profile type you want to associate this attribute with, such as "Full-time employees". On the **Details** tab, click **Edit**, select the **Cost Center** attribute, and click **Save**.
On the profile type's **User automation** tab, set up a rule to assign the appropriate users. For example, you might match all users with an `employmentType` of "Full-Time".
After the next connector sync and directory merge, the Cost Center value appears on each assigned user's profile. You can now reference it in policies and CEL expressions.
### Example: Active Directory attribute for account correlation
Suppose your organization stores GitHub usernames in a custom Active Directory attribute called `githubUserName`, and you want C1 to use that attribute to match users to their GitHub accounts.
Make sure your Active Directory connector is set up and syncing. After sync, the `githubUserName` value is available on each user's AD account.
Navigate to **Directory** > **Directory sources** > **Attribute manager** and click **Add attribute**. Select **Custom**, name it "GitHub Username", and use **Direct mapping** to select your Active Directory application and the `githubUserName` field. Click **Create**.
Add the **GitHub Username** attribute to the appropriate profile type and make sure the relevant users are assigned to it.
After the next sync, the GitHub Username value appears on each assigned C1 user's profile. You can now use this attribute in an [account correlation rule](/product/admin/managing-accounts) to automatically match C1 users to their GitHub accounts.
### Troubleshooting missing attributes
**Attribute mapped but not visible on users.** The most common cause is that the attribute isn't bound to a profile type, or users aren't assigned to the profile type that has the attribute. Check both the profile type's **Details** tab (for attribute bindings) and **Assigned users** tab (for membership).
**Changes don't appear immediately.** Attribute values update during connector sync and directory merge cycles. After making configuration changes, you can trigger a sync manually from the application's details page or wait for the next scheduled sync.
**Legacy profile type behavior.** Tenants created before November 2025 have an auto-created **Legacy** profile type that contains all users. If your tenant has a Legacy profile type, its custom attributes apply to all users as a baseline. When you create new profile types and assign users to them, those profile types take priority over the Legacy type for the attributes they define. Users who aren't assigned to any non-Legacy profile type continue to receive attributes from the Legacy type.
**Custom versus standard attributes.** Most standard user attributes (like `user.department` or `user.jobTitle`) are available in CEL expressions. However, only custom attributes can be bound to profile types. If you need a custom attribute that contains the same data as a standard attribute, [create a custom attribute mapping](/product/admin/attributes#create-and-map-custom-user-attributes) that points to the same source field.
## Create a new profile type
By default, a C1 tenant supports two profile types. For customers whose tenants were in use before November 2025, you'll initially find one auto-created **Legacy** profile type containing all your users and the capacity to create two additional profile types.
Need more than two profile types? Let us know, we'll be happy to get you set up.
Profile types allow you to group users and define the specific set of attributes relevant to that group. Follow these steps to create a new profile type.
### Before you begin
Make sure you've [mapped the custom attributes](/product/admin/attributes) you want to associate with the profile type. You can add additional attributes any time.
### Step 1: Set up the new profile type
Navigate to **Directory** > **Directory sources** and select the **Profile types** tab.
Click **Add profile type**.
Give the profile type a descriptive name. You can add a description as well, if desired.
**What's a profile type slug?**
This is a special tag for your profile type that will allow it to be referenced in CEL expressions. We're working on adding this new feature and it will be ready for use soon, but for now you can skip adding a slug.
Upload an icon to associate with the profile type across C1. Click **Upload image** and select an image of at least 200x200px in either PNG, JPED, or WebP format.
Click **Save profile type**. The new profile type will now appear in your list.
### Step 2: Add relevant attributes to the profile type
Next, select the specific user attributes that should be visible and manageable for users assigned to this profile type.
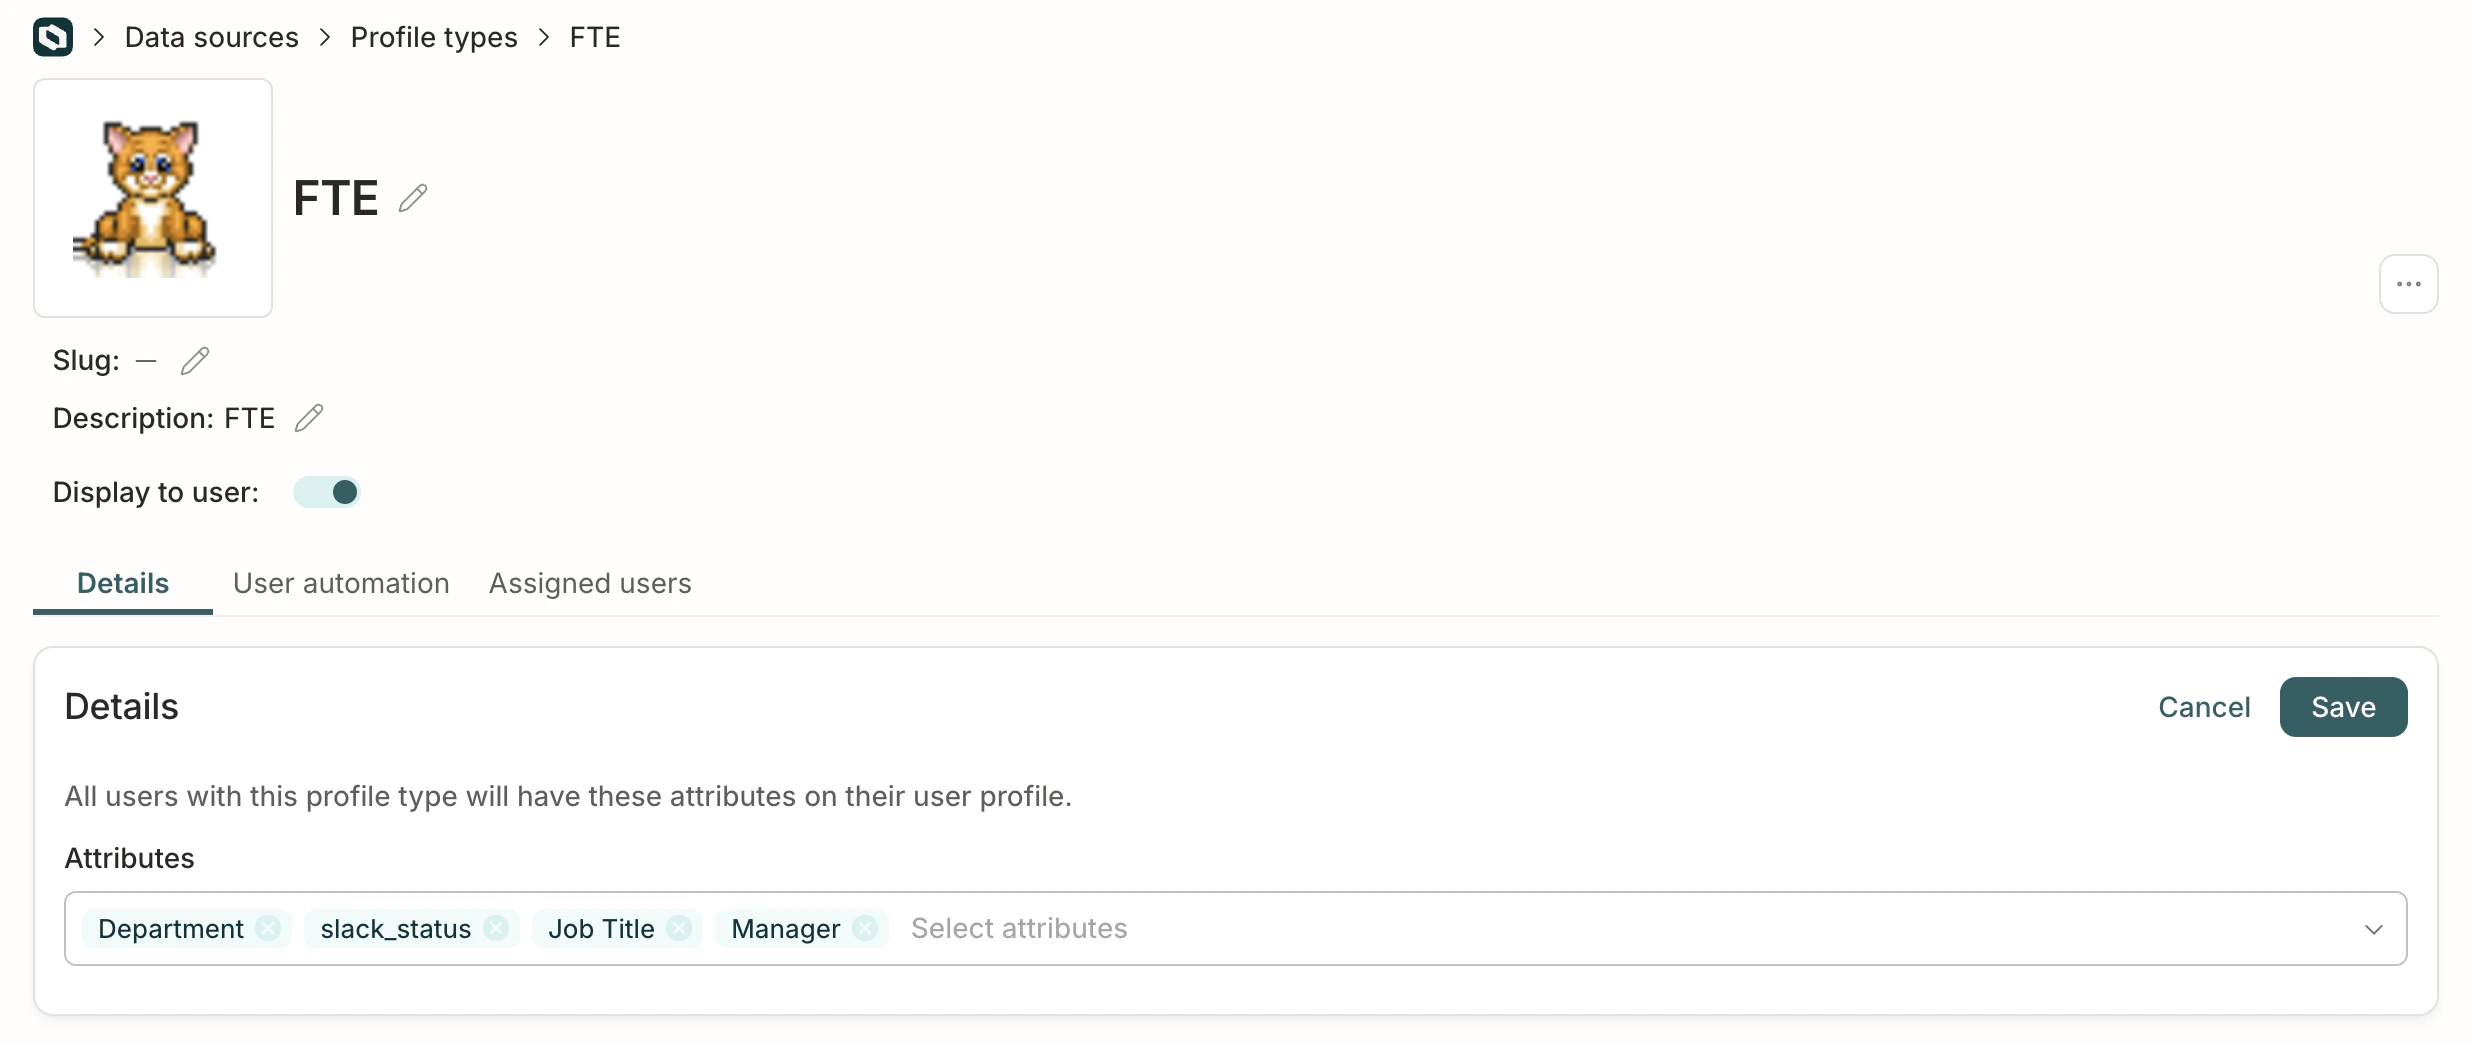 Select the newly created profile type from the list.
On the profile type's **Details** tab, click **Edit**.
Select the attributes that are associated with this profile type. Only the attributes you select will be visible on the **Profile attributes** section of users who are assigned this profile type.
Click **Save**.
**Optional.** Use the **Display to user** toggle to control whether this profile type is shown on users' details pages. When disabled, the profile type will not be visible to end users viewing their own profile or to managers viewing their direct reports' profiles.
### Step 3: Assign users to the profile type
Finally, define the criteria C1 will use to automatically assign users to this profile type. You can also add users manually, if needed.
Navigate to the profile type's **User automation** tab and click **Edit**.
Choose how to form your user automation rule:
* Use the **Basic** condition builder to construct a rule from a combination of entitlements and [profile attributes](/product/admin/attributes) (see note below on which profile attributes are supported), with the option to add **and** and **or** statements to refine the rule.
**Supported attributes in the basic condition builder** The value input field in the basic condition builder currently only supports string values. Certain attributes are stored as enums (fixed lists of values) or arrays (multiple values), which cannot be correctly parsed when entered as a simple string in the basic builder. If you use these attributes in the basic builder, the system will treat the input as a literal string, and the policy or membership rule may not behave as expected.
The following attributes are not supported in the basic condition builder:
* Additional Employee ID
* Additional Username
* Additional Email
* Directory Status
* Manager Email
If you need to use any of the attributes listed above, you must compose a CEL expression in the **Expression** field.
* Use the **Expression** field to to compose a [CEL expression](/product/admin/expressions) that describes the membership rule.
Click **Preview** to check the syntax of your CEL expression. Note that not all users who match the membership rule will be shown immediately when you click **Preview**.
**Optional.** In the **Excluded users** field, add the names of any users who should be excluded from this group, even if they match the membership rule.
When you're satisfied, click **Save**. The automation syncs and adds a list of matching users on the **Assigned users** tab.
Depending on the number of users in your C1 installation, syncing might take some time. You can kick off a new sync any time from the **User automation** tab.
**Done.** Repeat this process to add additional profile types. Once they're set up, you're ready to start using them across C1.
Select the newly created profile type from the list.
On the profile type's **Details** tab, click **Edit**.
Select the attributes that are associated with this profile type. Only the attributes you select will be visible on the **Profile attributes** section of users who are assigned this profile type.
Click **Save**.
**Optional.** Use the **Display to user** toggle to control whether this profile type is shown on users' details pages. When disabled, the profile type will not be visible to end users viewing their own profile or to managers viewing their direct reports' profiles.
### Step 3: Assign users to the profile type
Finally, define the criteria C1 will use to automatically assign users to this profile type. You can also add users manually, if needed.
Navigate to the profile type's **User automation** tab and click **Edit**.
Choose how to form your user automation rule:
* Use the **Basic** condition builder to construct a rule from a combination of entitlements and [profile attributes](/product/admin/attributes) (see note below on which profile attributes are supported), with the option to add **and** and **or** statements to refine the rule.
**Supported attributes in the basic condition builder** The value input field in the basic condition builder currently only supports string values. Certain attributes are stored as enums (fixed lists of values) or arrays (multiple values), which cannot be correctly parsed when entered as a simple string in the basic builder. If you use these attributes in the basic builder, the system will treat the input as a literal string, and the policy or membership rule may not behave as expected.
The following attributes are not supported in the basic condition builder:
* Additional Employee ID
* Additional Username
* Additional Email
* Directory Status
* Manager Email
If you need to use any of the attributes listed above, you must compose a CEL expression in the **Expression** field.
* Use the **Expression** field to to compose a [CEL expression](/product/admin/expressions) that describes the membership rule.
Click **Preview** to check the syntax of your CEL expression. Note that not all users who match the membership rule will be shown immediately when you click **Preview**.
**Optional.** In the **Excluded users** field, add the names of any users who should be excluded from this group, even if they match the membership rule.
When you're satisfied, click **Save**. The automation syncs and adds a list of matching users on the **Assigned users** tab.
Depending on the number of users in your C1 installation, syncing might take some time. You can kick off a new sync any time from the **User automation** tab.
**Done.** Repeat this process to add additional profile types. Once they're set up, you're ready to start using them across C1.